Smart Bundle Documentation
This guide explains how to configure Smart Bundle from the Shopify admin dashboard and create dynamic, discounted product bundles for your store.
1. App Dashboard Overview
After installing the app, open Smart Bundle from the Apps menu in your Shopify admin. The dashboard shows your subscription status, bundle statistics (Total Bundle Groups, Active, Deactivated, Bundle Products), recent bundle activity, and quick access to create a new bundle. The left sidebar gives you access to Bundle Groups, Widget Settings, and Pricing.
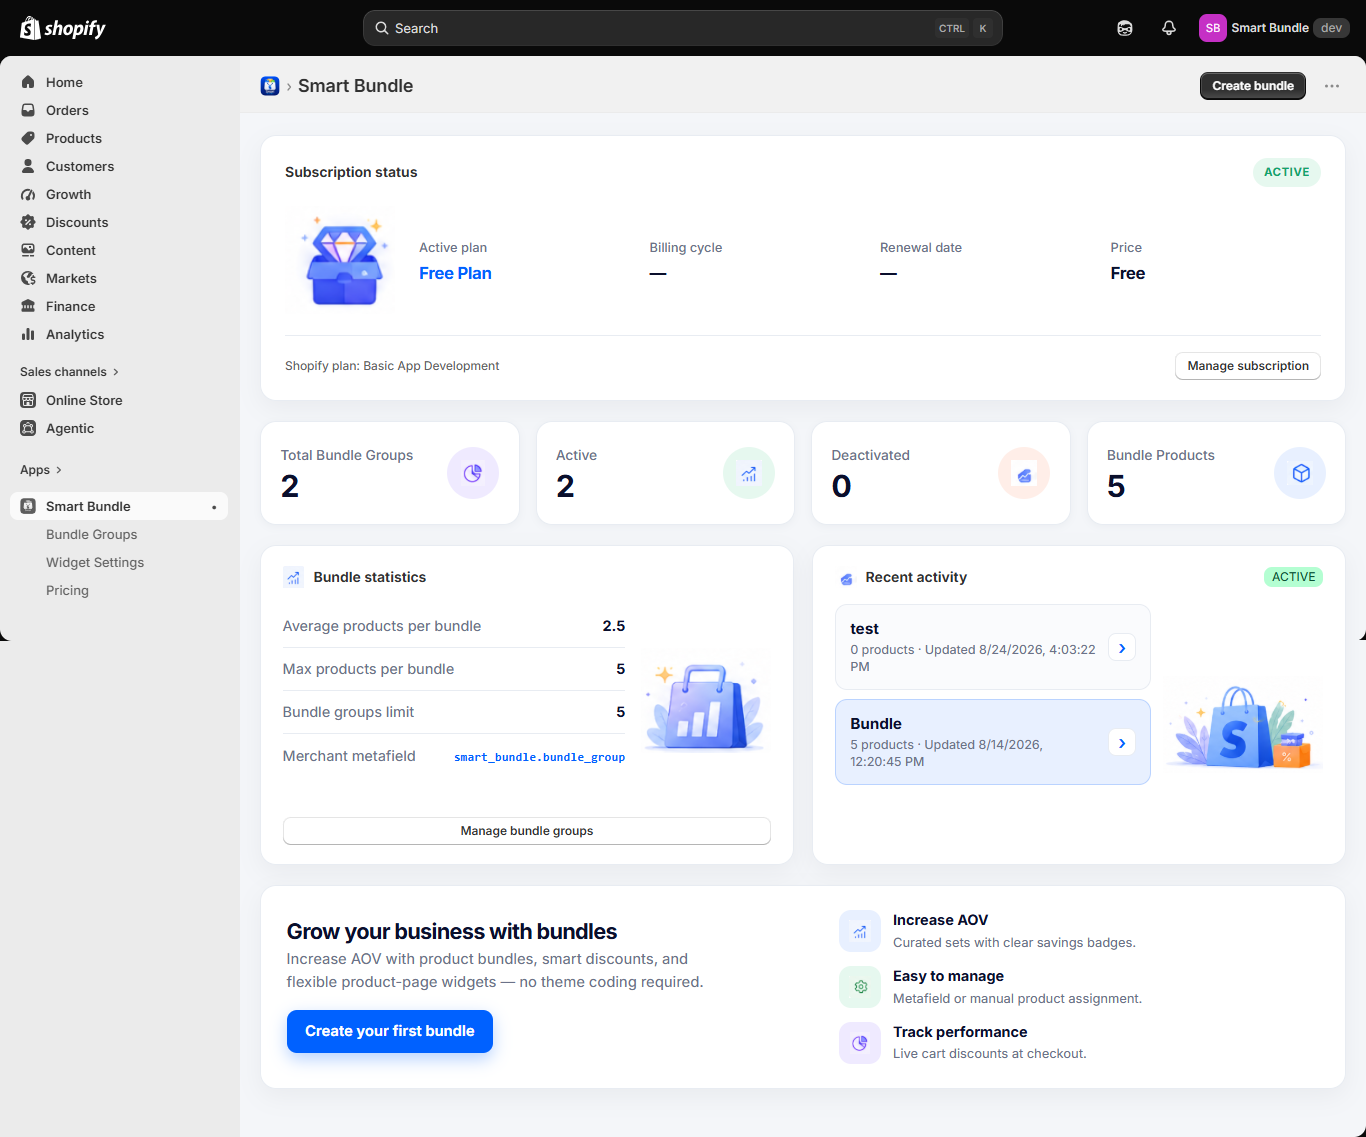
Smart Bundle Dashboard
2. Bundle Groups
The Bundle Groups page lists all your bundles, with their status,
discount, product count, and last updated date. Click Create Bundle
Group to set up a new bundle. Bundles are assigned to products using
the product metafield smart_bundle.bundle_group, which
stores the Bundle Group ID.
Bulk enable, disable, or delete requires the Developer, Growth, or Professional plan. The Free Plan supports single-bundle edits only.
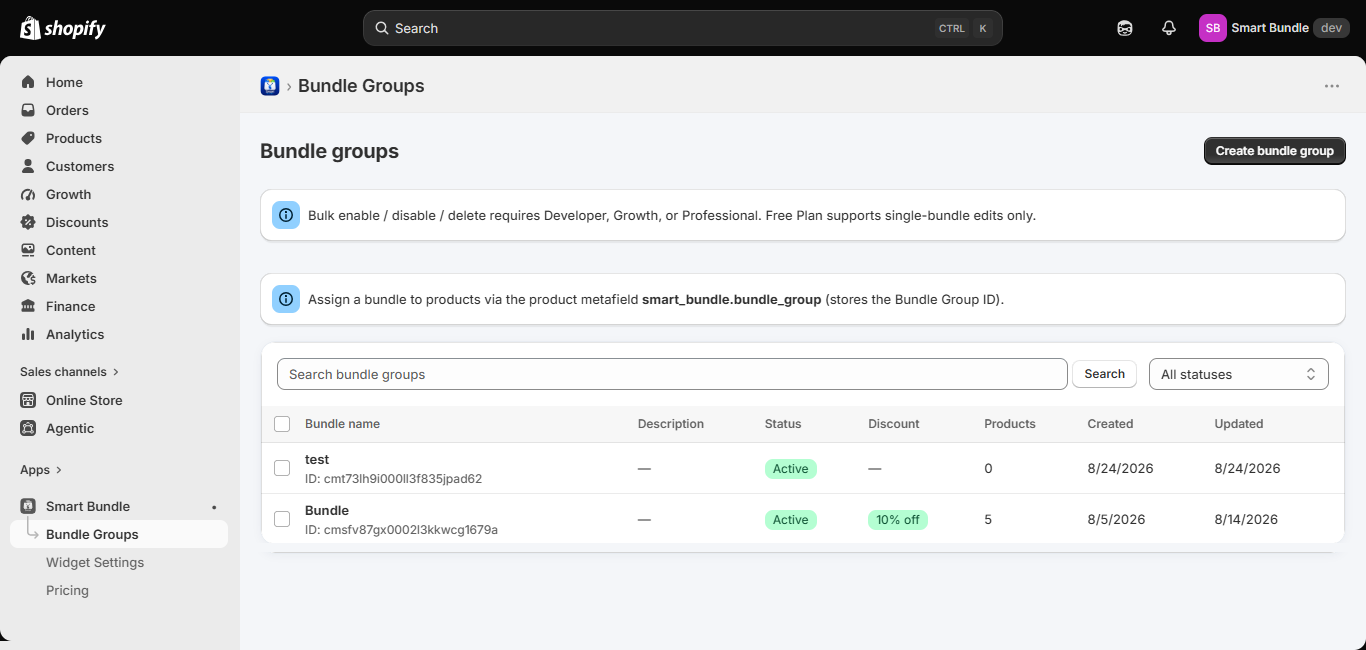
Bundle Groups list
3. Create a Bundle Group
Click Create Bundle Group to open the creation form. Fill in the Bundle name, an optional Description, and set the Status (Active).
Under Display location, choose where the bundle can appear: Product page, Show on Homepage, and/or Custom page / landing pages.
Under Display assignment, choose the Assignment method (for example, Product metafield assignment) and set a Default assignment priority — a lower number wins when a product is assigned to multiple bundle groups. You can also toggle Enable bundle display.
Under Discount settings, toggle Enable discount to configure a bundle-level discount shown and calculated on the storefront when customers select products.
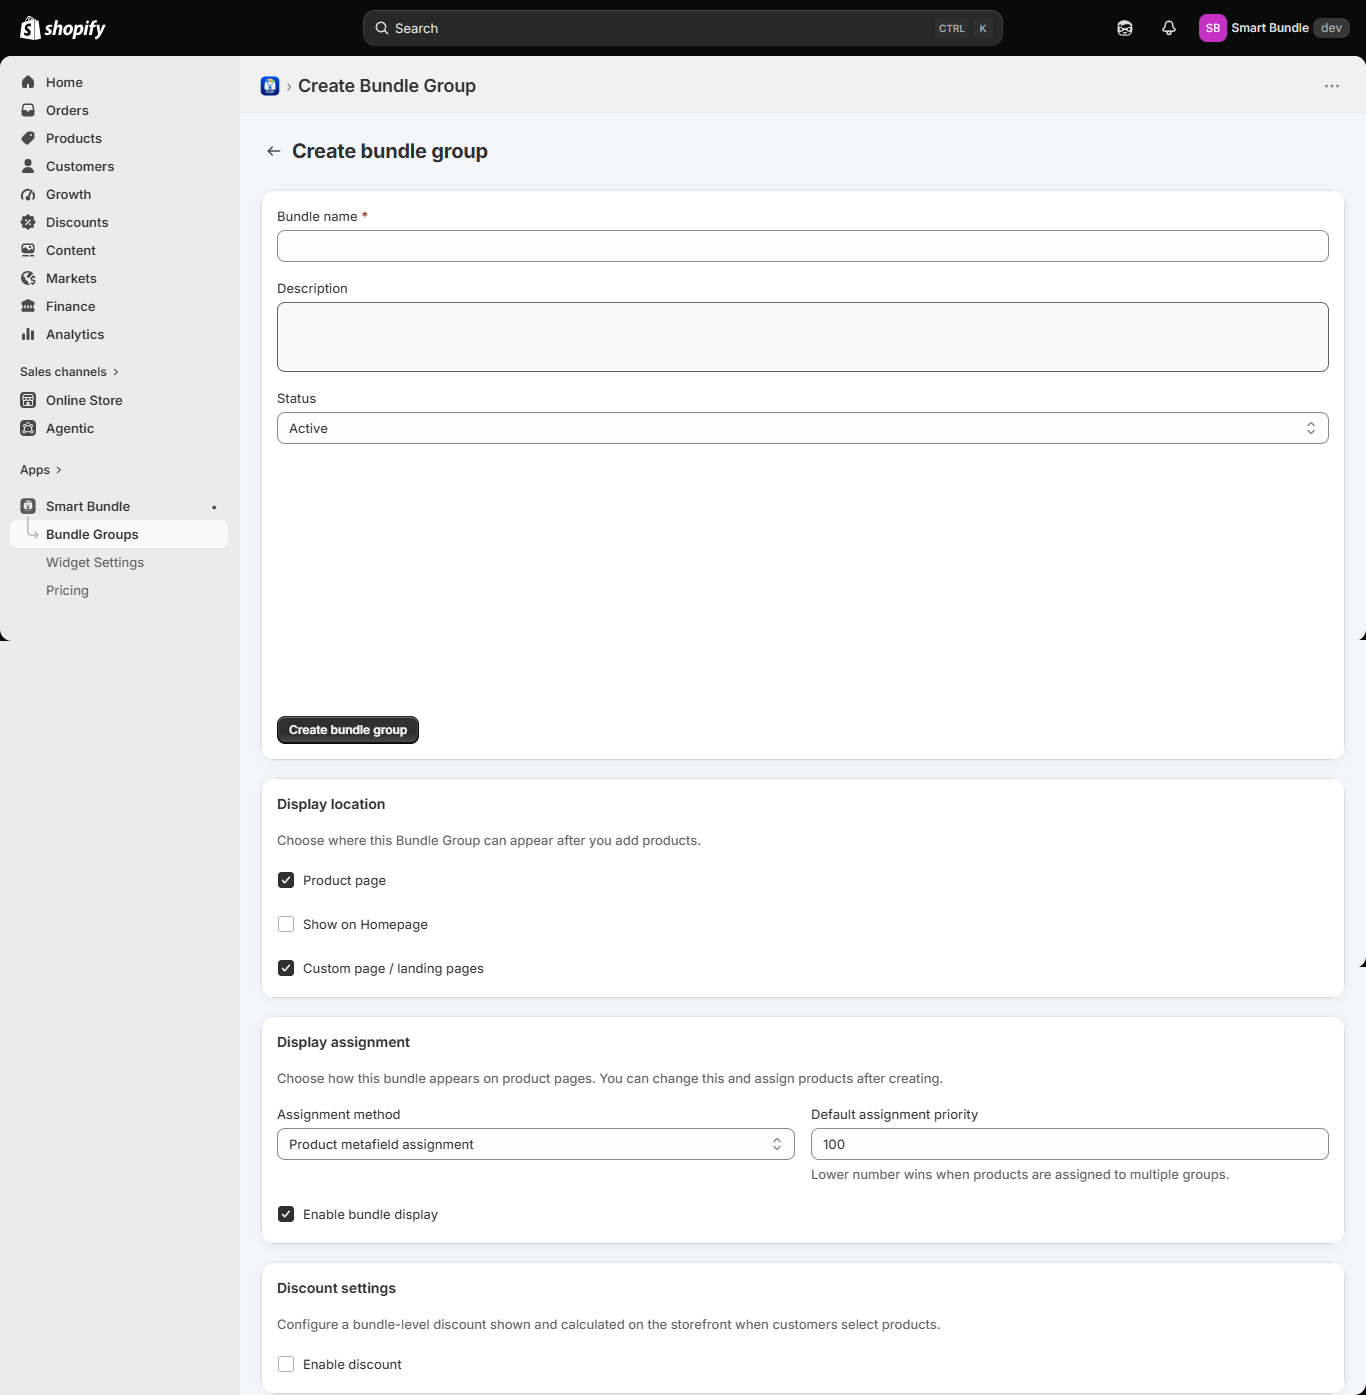
Create Bundle Group form
4. Discount Settings
Inside the Create Bundle Group form, under Discount settings, toggle Enable discount to configure a bundle-level discount that is shown and calculated on the storefront when customers select products.
5. Widget Settings
The Widget Settings page lets you choose layout and customization defaults for your storefront widgets. Store-level defaults here are used as a fallback when a Theme App Extension block setting is not set. Use either the product App Block or the auto-embed — not both — so only one widget is shown.
Widget layout: choose Layout (Full Width Bundle Builder or Compact Bundle List) and Recommended position (for example, After Add to Cart), and toggle Widget enabled (store default).
Copy: customize the Bundle title, Description override, Add to cart button text, Add to Bundle / Added to Bundle card labels, and Out of stock label.
Display options: toggle which elements appear on the
widget, including product images, prices, compare-at prices, total
savings, quantity selector, stock status, bundle title, variant
labels, bundle summary, and progress indicator. You can also set a
Progress message using the {count} and {percent}
placeholders.
Style: set the Button color, Button text color, Background color, Text color, Accent (savings) color, Border radius, Typography size, Spacing, and optional Custom CSS.
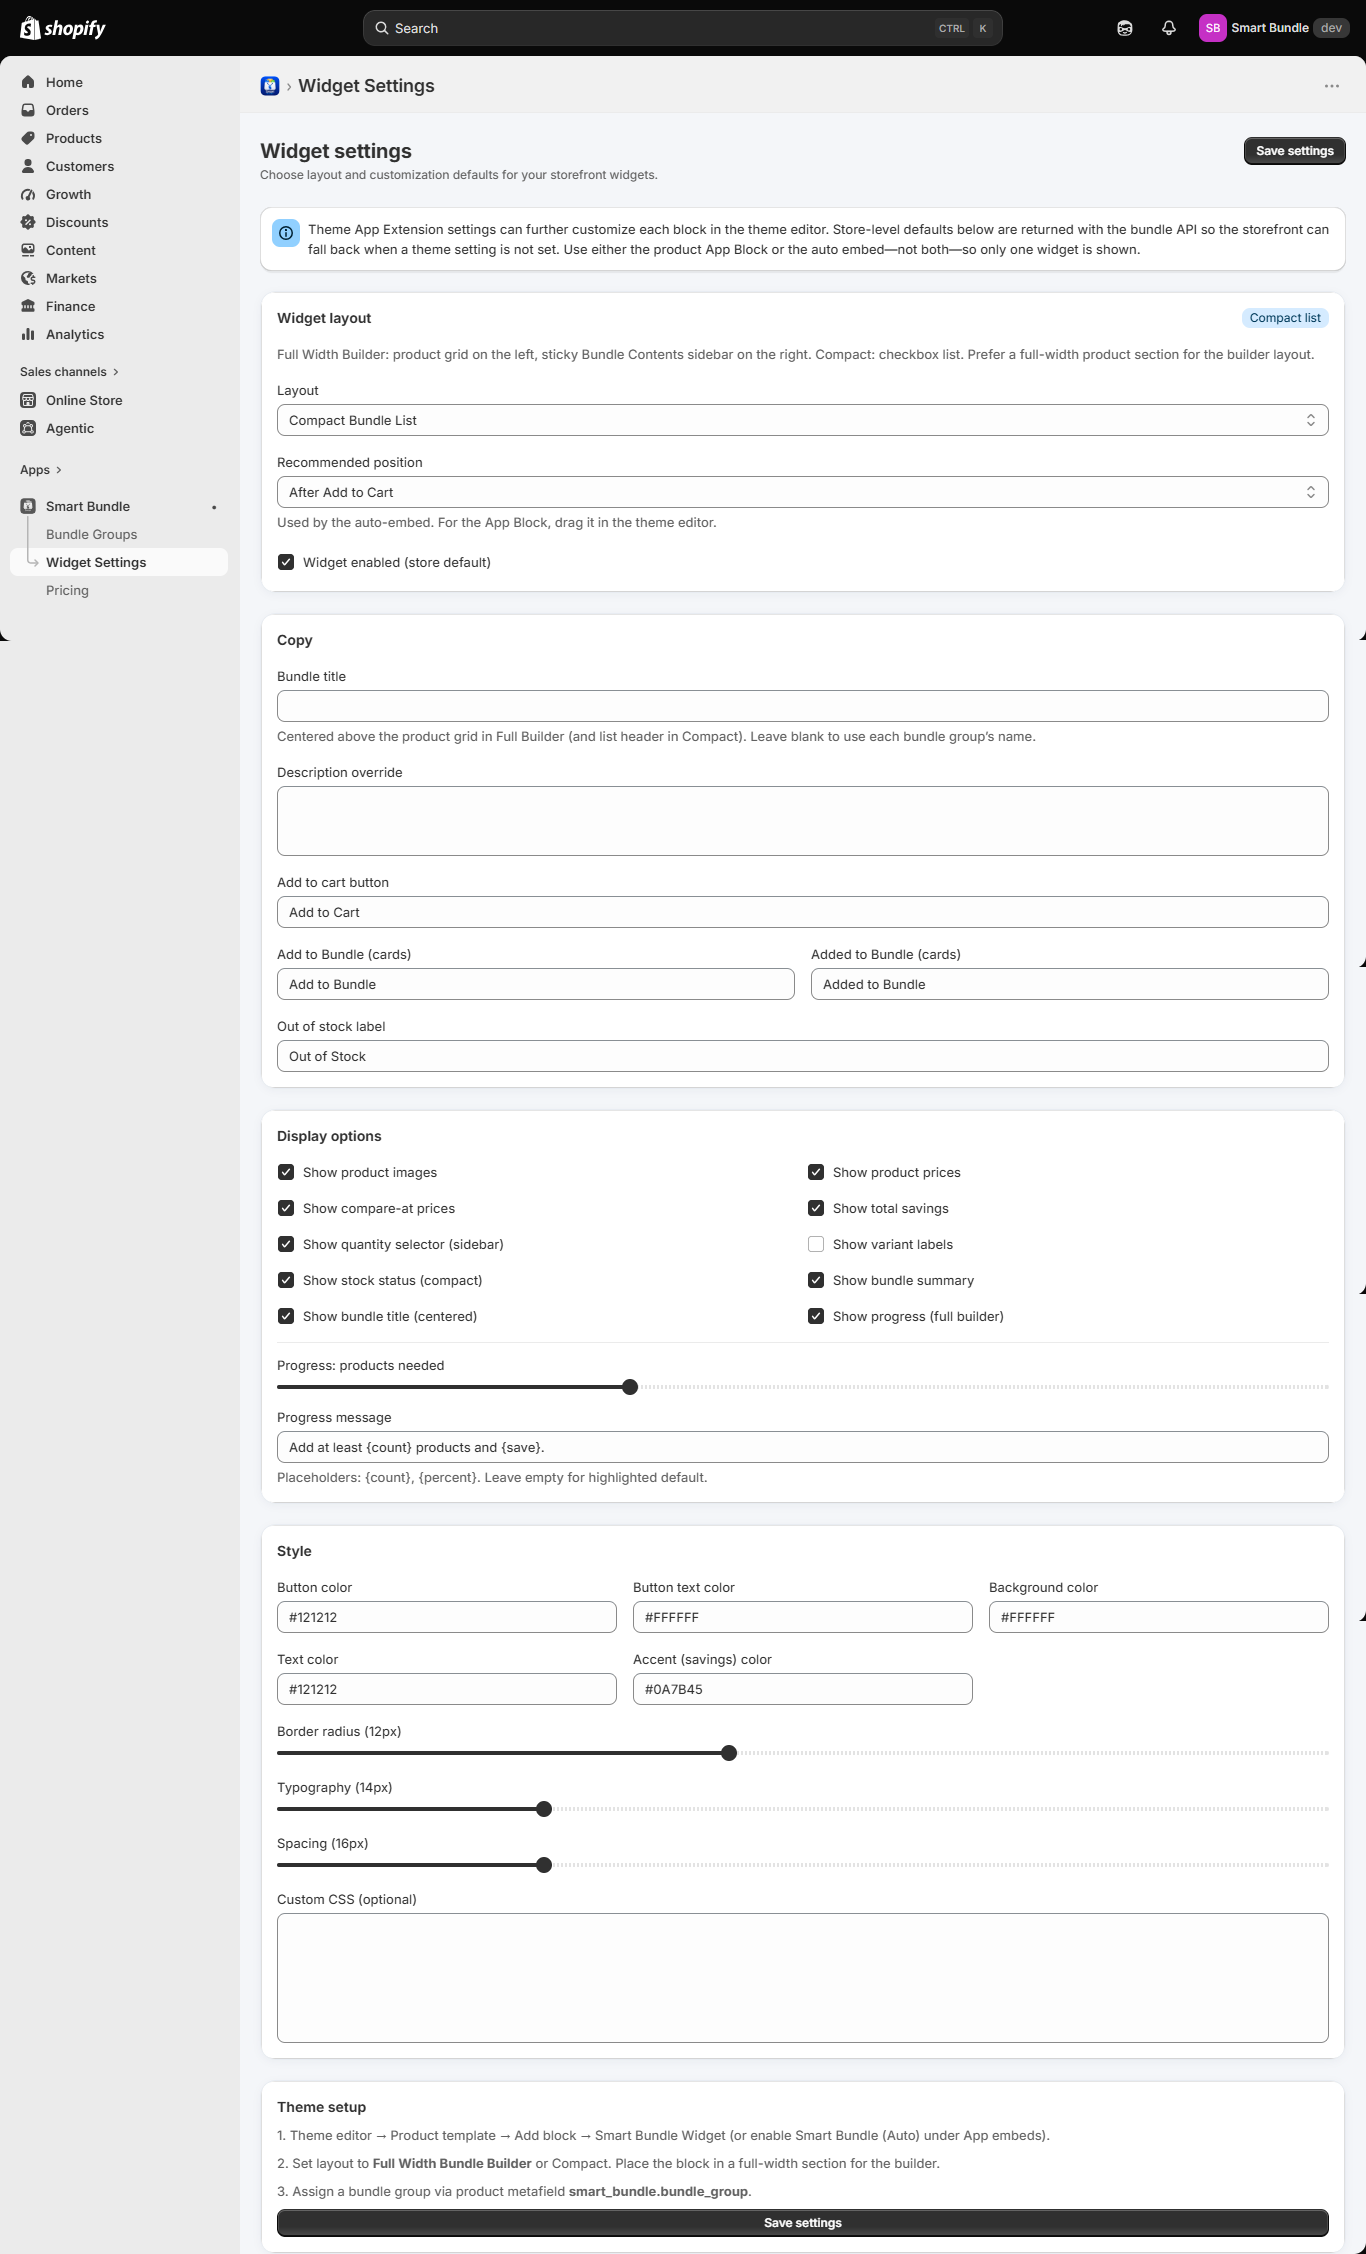
Widget Settings page
6. Metafield Assignment
Smart Bundle assigns bundles to products using the product metafield
smart_bundle.bundle_group, which stores the Bundle Group
ID. Set the assignment method when creating a bundle group (Display
assignment → Assignment method → Product metafield assignment), and
set this metafield value on each product page in Shopify admin to
connect it to that bundle group.
7. Theme Setup
- In the Shopify Theme Editor, go to Product template → Add block → Smart Bundle Widget (or enable "Smart Bundle (Auto)" under App embeds).
- Set the layout to Full Width Bundle Builder or Compact. Place the block in a full-width section for the builder layout.
- Assign a bundle group via the product metafield
smart_bundle.bundle_group.
Theme setup instructions on the Widget Settings page
Need Help?
If you need assistance with setup, contact our support team.
Email: [email protected]
Go to Support