
1. Getting Started
Smart Meta Importer is a Shopify app for merchants who need to bulk import and export product and variant metafields using CSV files. It is built for catalog teams that maintain rich structured data—ingredients, specs, custom attributes, nutrition tables, and more.
Use this guide if you are:
- Installing the app for the first time
- Setting up CSV column mapping for product/variant metafields
- Running exports with filters
- Diagnosing skipped or failed import rows
2. Install the App
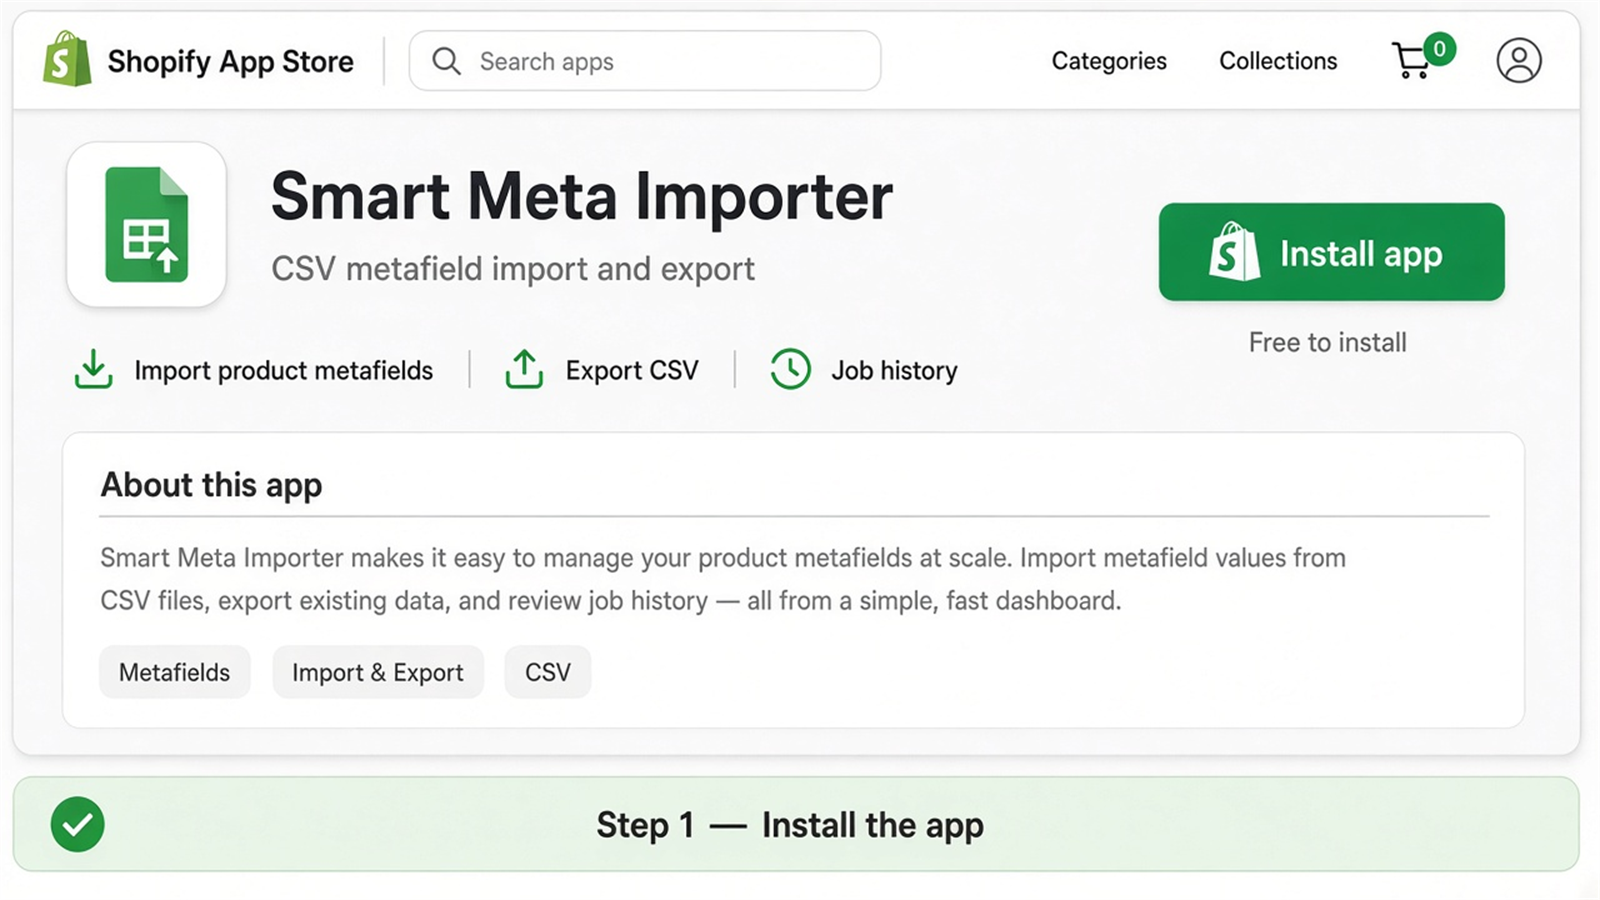
- Open the Shopify App Store listing for Smart Meta Importer.
- Click Add app / Install.
- Review the requested permissions (products, inventory, and related scopes).
- Confirm installation for your store.
assets/screenshots/install-app.png.3. Open the App
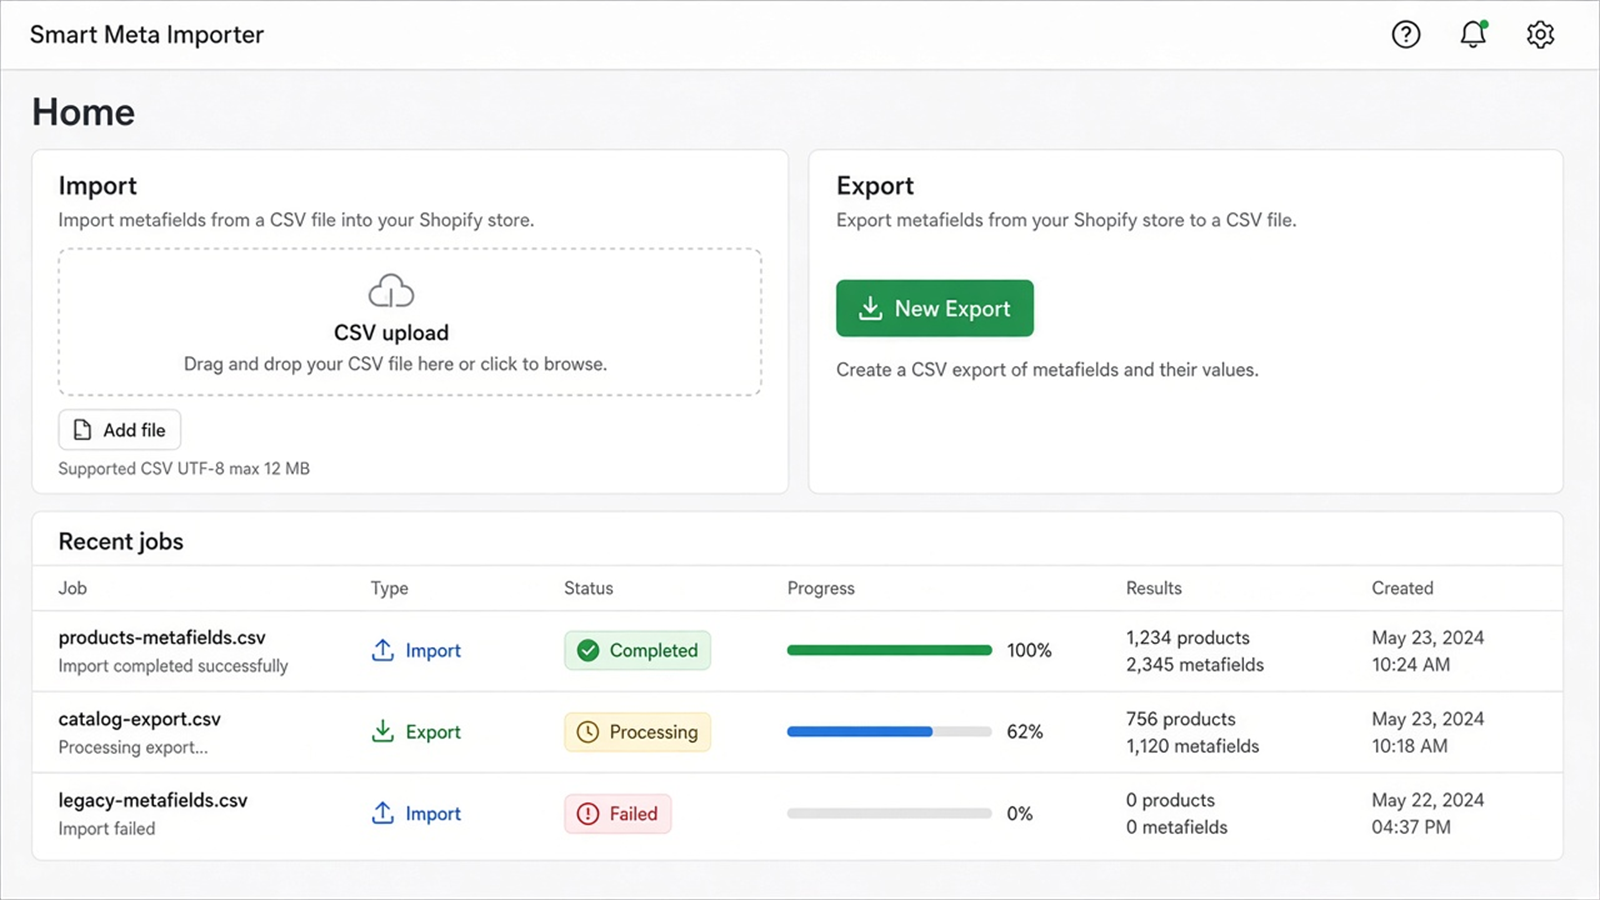
- In Shopify Admin, go to Apps.
- Select Smart Meta Importer.
- Wait for the embedded app to load the home/dashboard view.
assets/screenshots/open-app.png.4. Initial Setup
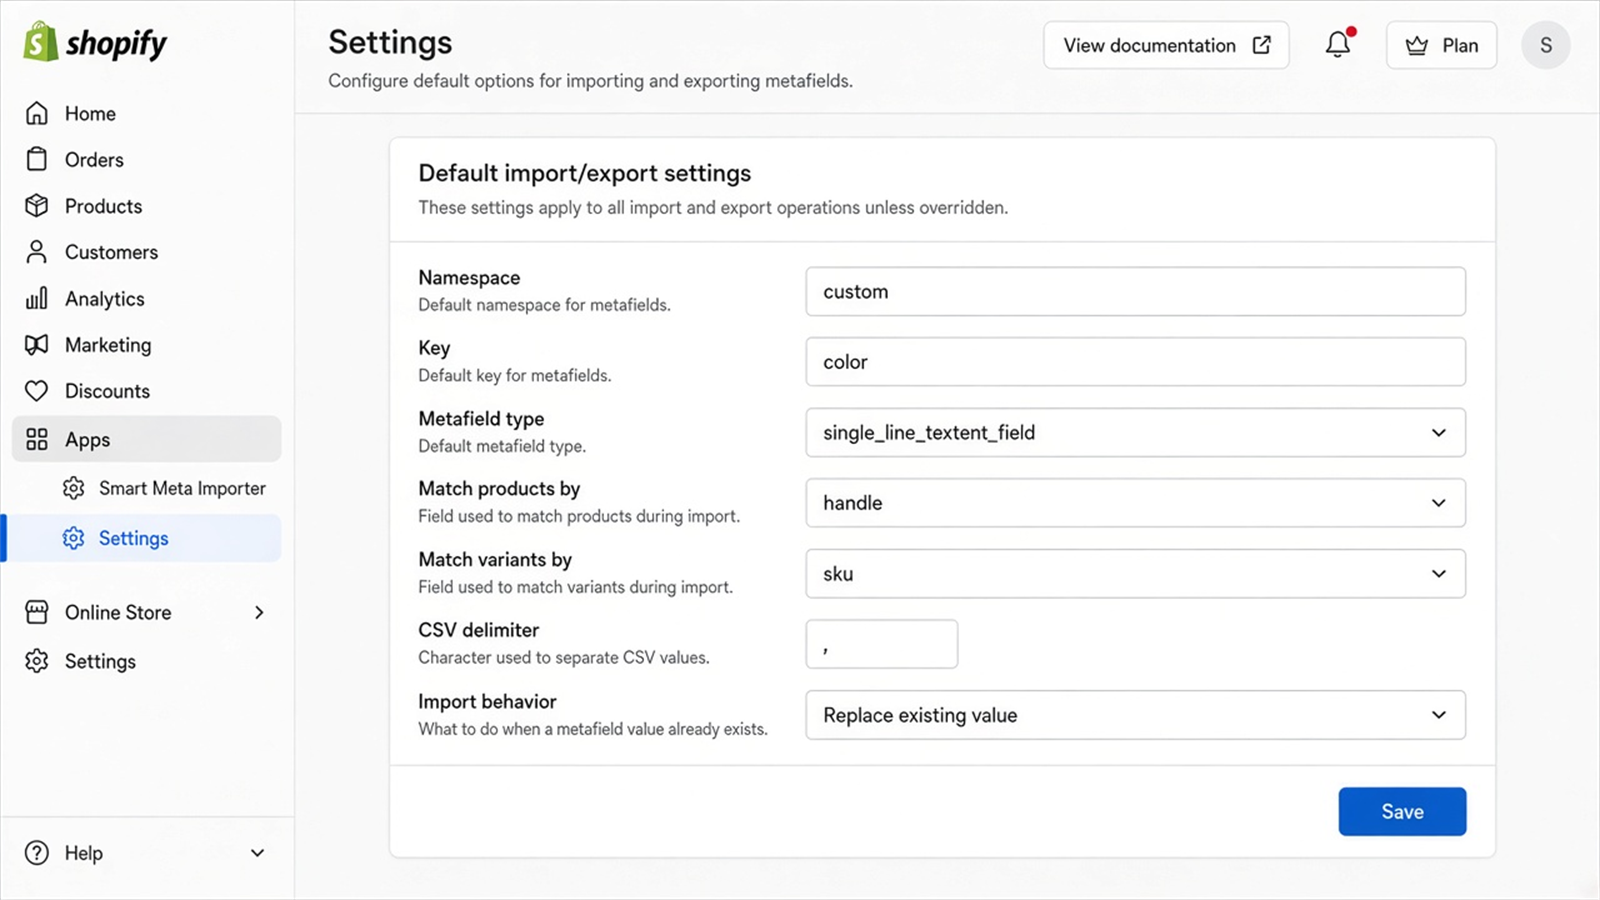
On first launch, review the onboarding/setup screen. Confirm your store is connected and that you can see Import, Export, Settings, Templates, History, and Pricing navigation.
- Open Settings (or the initial setup panel).
- Choose default match behavior (handle / ID / SKU).
- Confirm CSV delimiter defaults (usually comma).
- Decide whether imports should merge or replace existing metafield values by default.
assets/screenshots/setup.png.5. Configure App Settings
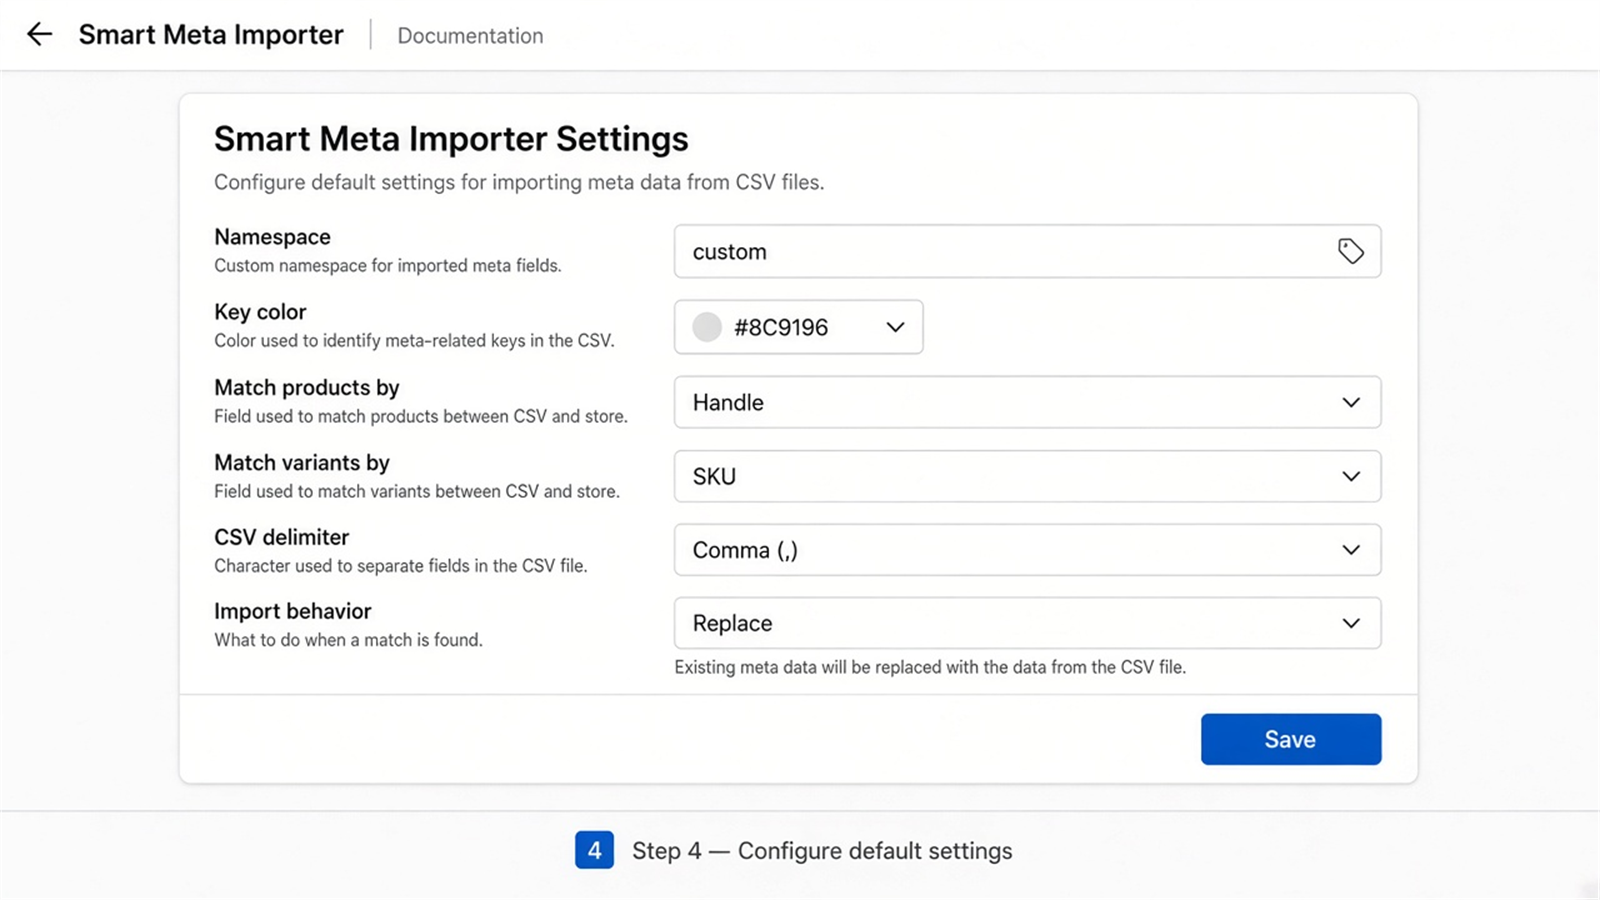
Each setting below controls how CSV jobs behave. Update these before large imports.
Setting: Product match key
What it does: Tells the app how to find the correct Shopify product for each CSV row.
How to configure: Choose handle, product ID, or another supported identifier that exists in your CSV.
assets/screenshots/settings.png.Setting: Variant match key
What it does: Resolves the correct variant when importing variant metafields or inventory.
How to configure: Prefer SKU when your catalog SKUs are unique. Otherwise use the variant identifier column your export provides.
Setting: Merge vs replace
What it does: Controls whether mapped metafield values overwrite existing data or merge where supported.
How to configure: Use replace for clean overwrites; use merge when you want to preserve unrelated values.
Setting: CSV delimiter
What it does: Defines how columns are split when parsing uploads.
How to configure: Keep comma for standard CSV. Switch only if your spreadsheet locale exports semicolons.
6. Configure Rules / Features
Map CSV columns
- Go to Import.
- Upload your CSV file.
- Map identifier columns (product/variant).
- Map each data column to a metafield namespace + key (+ type when required).
- Save the mapping if you will reuse it.
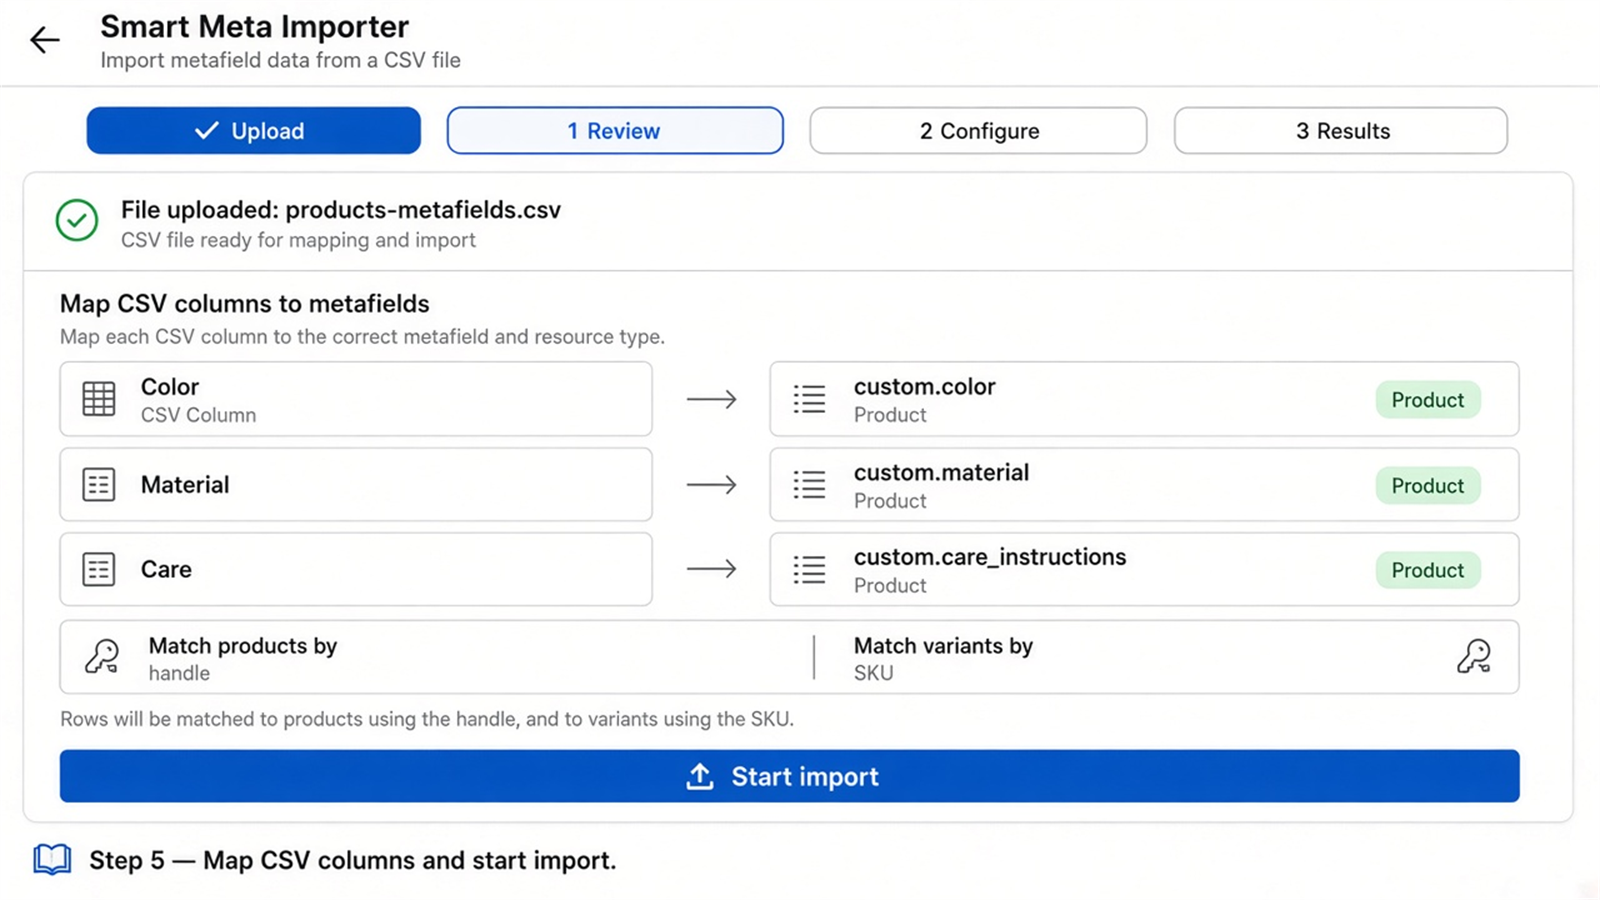
assets/screenshots/mapping.png.Run an import
- Confirm mapped columns look correct.
- Start the import job.
- Watch progress for success / updated / skipped / failed counts.
- Download the error log if any rows fail.
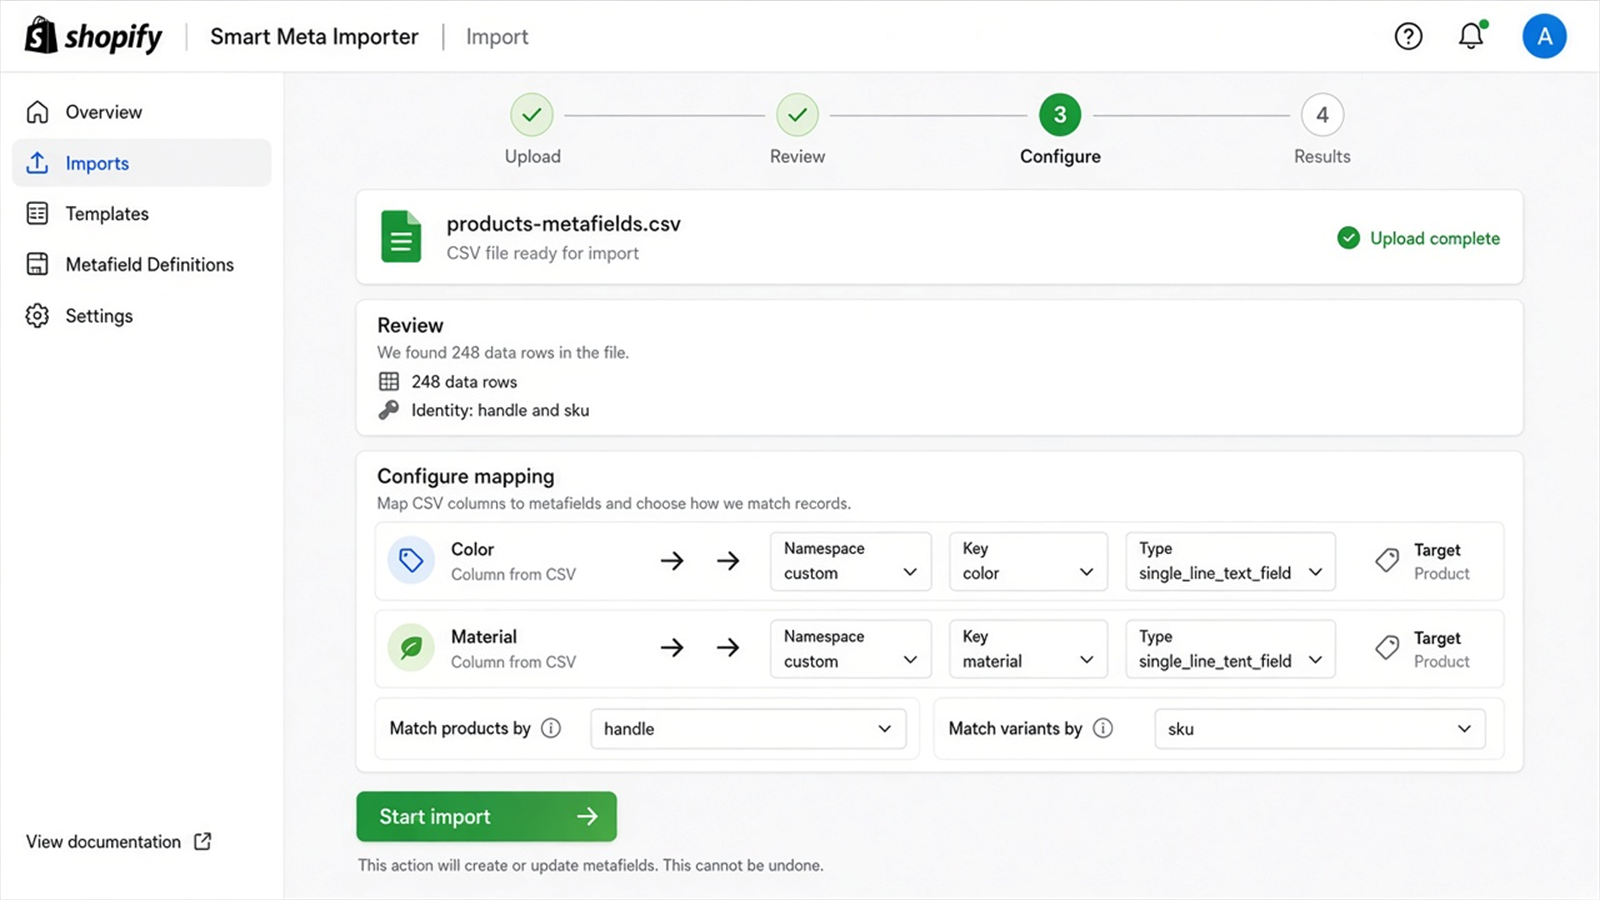
assets/screenshots/import.png.Export metafields
- Open Export.
- Choose product, variant, or both.
- Apply filters (all, collection, vendor, type, tags, or selected products).
- Download the generated CSV.
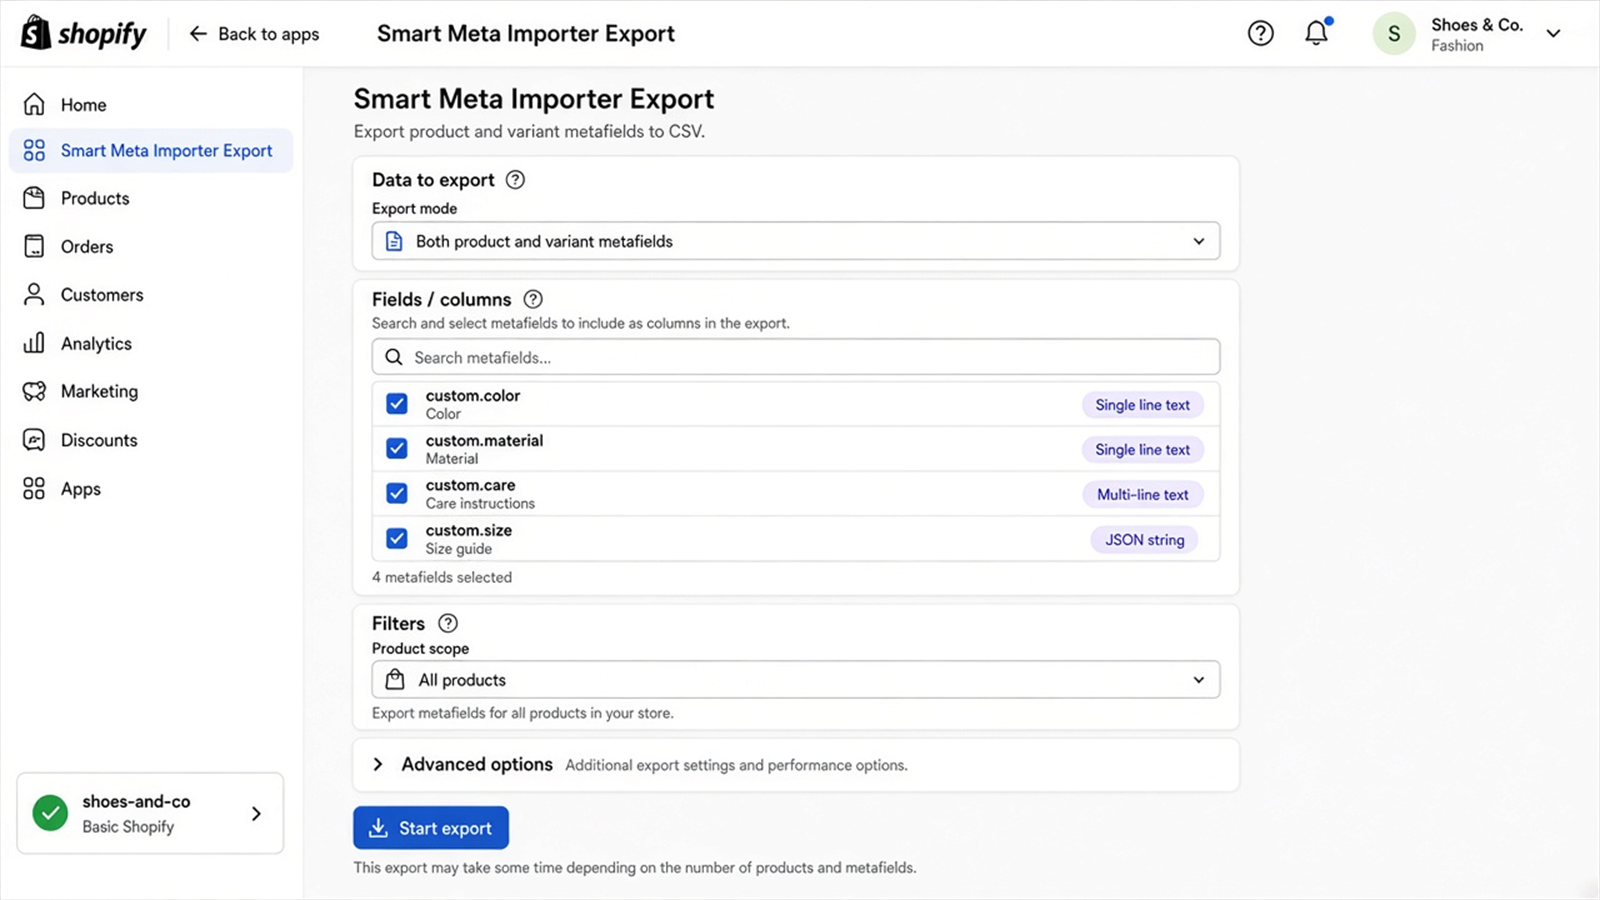
assets/screenshots/export.png.Optional: inventory CSV updates
If your plan and settings allow inventory updates, include quantity columns and a location-aware configuration as shown in the app. Treat inventory imports with the same test-first approach as metafield imports.
sample-tee,Organic cotton,Cold wash,TEE-S-001,Regular
7. Save and Activate
- Save settings and mapping preferences.
- Confirm your plan allows the intended import volume.
- Activate / run the job from the Import screen.
- Leave the job page open until processing completes (or check History afterward).
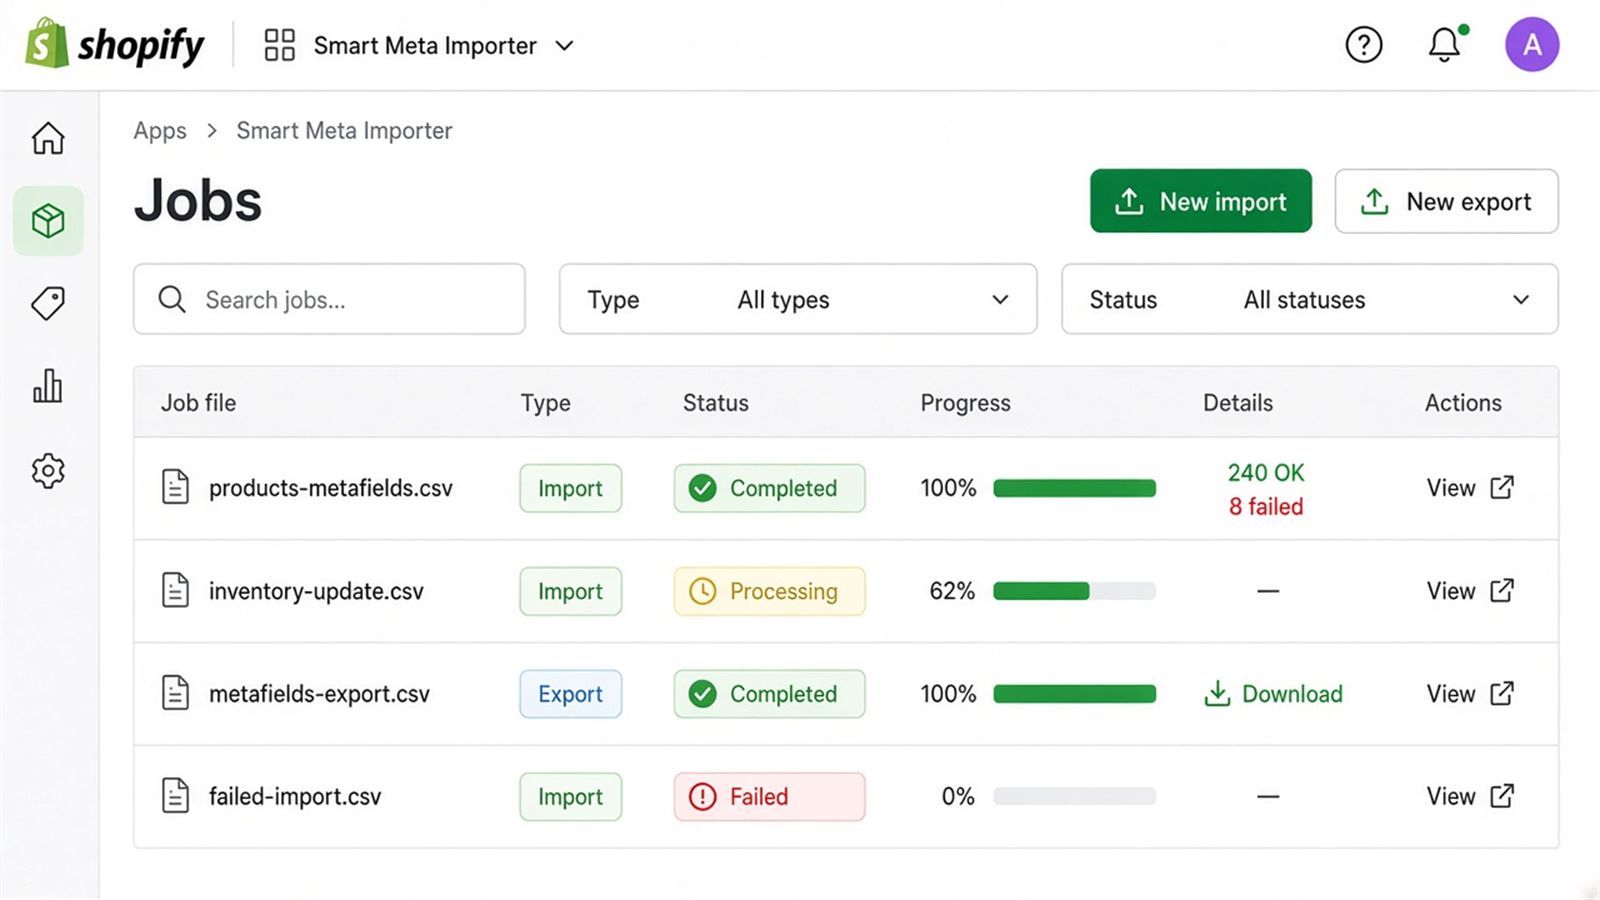
assets/screenshots/activate.png.8. Test the App
- Export a tiny product set (or create a 3-row CSV manually).
- Change one metafield value in the CSV.
- Import the file using your saved mapping.
- Open the product in Shopify Admin and confirm the metafield updated.
- Re-export and verify the new value appears in the CSV.
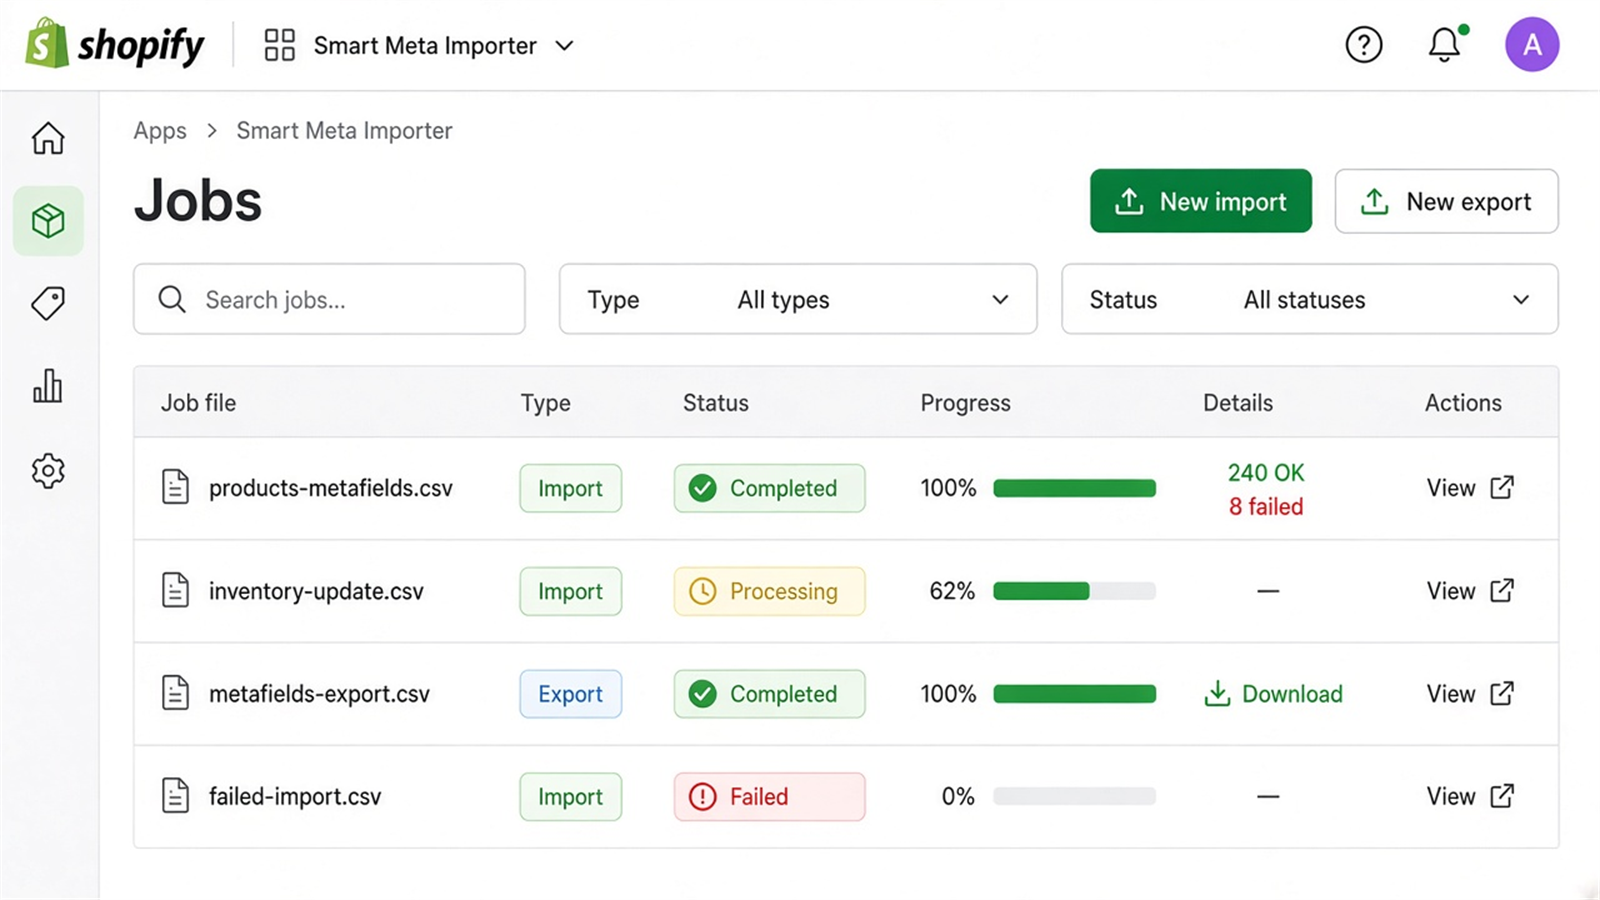
assets/screenshots/test.png.9. Troubleshooting
Check that the match key exists and is unique. Confirm handles/SKUs match Shopify exactly (case and spelling). Review the downloadable error log for the specific reason.
Ensure the CSV value matches the metafield definition type (for example number vs single-line text). For list/object styles, use the app templates as a starting point.
Open Pricing in the app, review remaining import allowance, and upgrade if needed before re-running the job.
Verify your filters and selected metafield keys. Products without those metafields may export empty cells by design.
10. FAQ
For a longer list of questions, visit the dedicated FAQ page.